Magnificent Madeleines
Time:
1h30m
Difficulty:
Easy
Loot
24 pastries (2 pans)
Back to middle school…
I’d say one of the upsides of that very awkward period of life was the 9AM school start time. Not too early, not too late. And in that hour after the fuss of sending my younger siblings to school, I’d often have about 30-40 minutes to myself to relax and mentally prepare for the day ahead. My companions were often a hot cup of Korean barley tea on a chilly, sludgy January morning, and a neatly wrapped, buttery madeleine cake from Costco. And every time I bit into one of those golden, vanilla-kissed shells, I always thought, Dang, I could never make these.
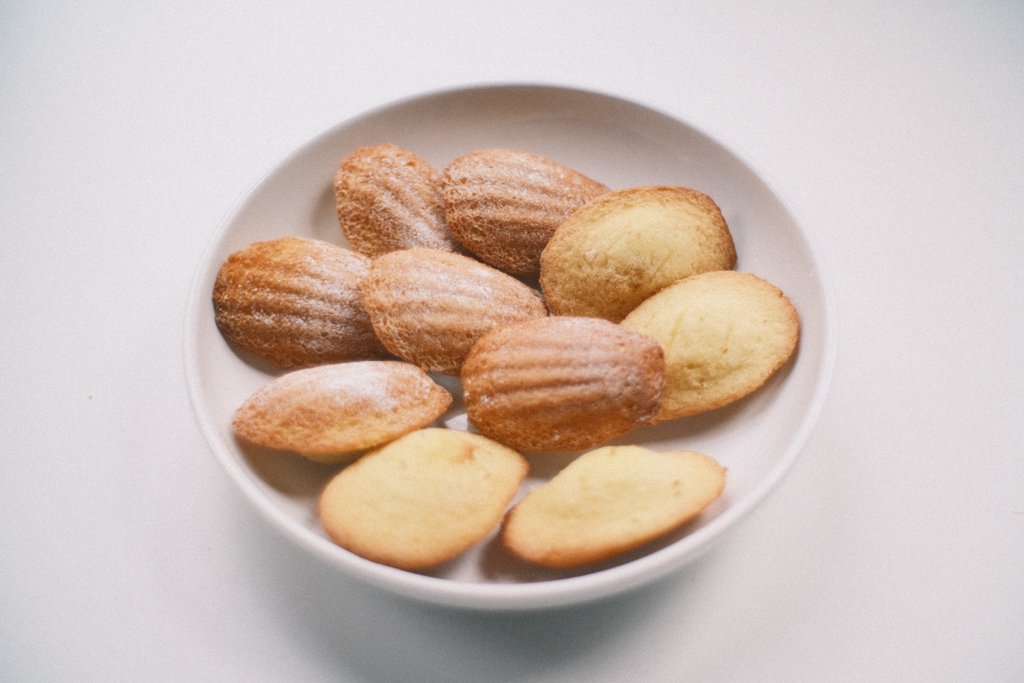
Fast forward to now – Merry Christmas, suckers. I got a madeleine pan. And after a day or two of experimenting, ruining a few batters, and cramming the fridge and freezer full of chilled mixing bowls and seashell-shaped sheets, I think I’ve got a pretty good recipe down. A luxuriously moist genoise sponge with the signature grooves on the front and heaping hump on the back. And here's a fun fact: mastering madeleines is a step towards conquering one of the fundamentals of French baking, getting you that much closer to start your journey screwing up macarons (a rite of passage for bakers, I’m no exception). Bonne chance!
Before you angry, angry French out there send me to the cultural guillotine – yes, I’ve tried lots of madeleines from the various French bakeries across Chicago to build a proper, non-Costco reference.
Word to the Wise
You need a Madeleine pan. They’re about 16 bucks on Amazon for a dozen-sized. Check it out!
Flour, butter, freeze your madeleine pan. Make sure to use room temperature butter with a pastry brush when greasing the grooves of your pan. Sift a bit of flour on top of it to stop it from sticking. Afterwards, flip the pan upside down a few times to remove any excess flour. This will help with that temperature shock.
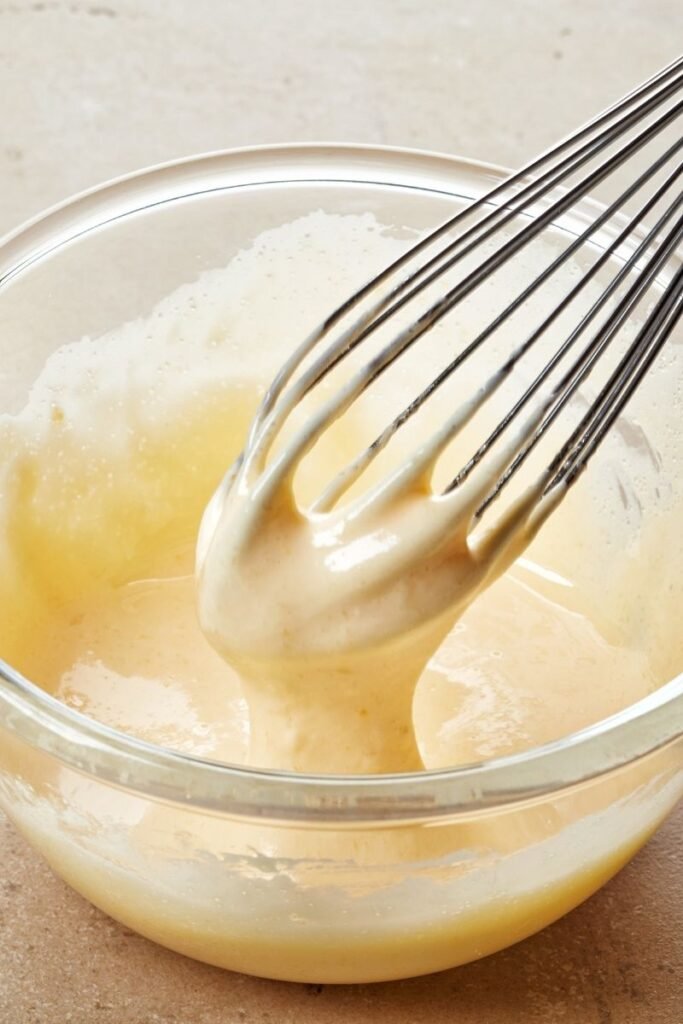
Remember the ribbon phase! Just like on Virgin Tiramisu, whip your eggs and sugar until they turn pale and double in volume, falling into thick, gloppy ribbons like this.
Chill your dough for 45 minutes to an hour. This is what helps create the beloved hump on the back of your pastry. The science? The temperature difference between the smoldering oven and the cold dough/pan is what shocks the batter and gives it the signature hump on the back.
Don’t overmix! This screwed me up a few times. Especially when folding in your extract/flavorings and dry ingredients, you have to be careful with this. Use a physical spatula and gently fold until JUST combined.
Give the eggs a bath. Room temperature eggs can be annoying. But by resting your eggs in room temperature water for a few minutes, you can warm them to room temp without much hustle.
Use corn starch: This one looks a bit surprising, I know. But basically, flour + corn starch makes a proto-cake flour mixture that will create a softer, fluffier crumb. Most recipes traditionally use cake flour, but I don’t want you to waste more of your hard-earned money on something easy to sub.
Cool your melted butter to room temperature. I know! Waiting sucks. But if you take your melted butter out of the microwave and directly pour it in, you’ll either A) get scrambled eggs or B) get a resulting cake that tastes super eggy. I don’t know about you, but I don’t want either of those.
Ingredients
1 cup (take away 2 Tbsp) all-purpose flour
2 Tbsp corn starch
1 tsp baking powder
½ tsp baking soda
⅛ tsp kosher salt
3 eggs, room temperature
⅔ cup granulated white sugar
1 tsp vanilla extract
1 tsp grated lemon/orange zest OR 1 tsp lemon juice
½ cup unsalted butter, melted, room temperature (1 stick)
Instructions
Place your 3 eggs into a small or medium sized bowl. Fill the bowl up with lukewarm water until all 3 eggs are just submerged.
In a heat-safe bowl, melt ½ cup of butter (1 stick) in the microwave with a COVER on. Set it out on the counter and let it cool to room temperature. We’ve got other business to attend to.
Take your eggs out of the water. They should no longer feel cold to the touch. Crack your eggs into a stand mixer bowl and add in your granulated sugar. On a high setting (6-8), whip these together with the whisk attachment for 5-6 minutes or until the mixture becomes pale and falls into thick, gloppy ribbons.
Add in your lemon zest/juice and vanilla extract, and mix on low (2) or stir setting until just combined.
Stirring on low speed, gently drizzle in your melted, room temperature butter. Stop mixing when just combined.
Taking your egg mixture off the stand mixer, place a sieve over your bowl. Into the sieve, add in your flour, corn starch, baking powder, baking soda, and salt.
In three parts, gently sift in a fraction of your dry ingredient mixture, and fold your mixture with a spatula until just combined and add the next part. This will ensure an even incorporation of your dry ingredients without the danger of overmixing it.
Use some cling wrap to seal the top of the bowl, and place your batter into the fridge for at least 30-45 minutes.
Preheat your oven to 425 degrees Fahrenheit.
Using softened butter, take a pastry brush and grease each of the grooves of your madeleine pan. Through a sieve, dust some all-purpose flour into each little groove. Flip over your madeleine pan to remove any excess, and stick in the freezer until your batter is done chilling.
Once the batter is done chilling, take both your pans and your batter out the fridge/freezer. Using an ice cream scoop or small spoon, scoop out a portion of batter into each groove of the madeleine pan until it is about ¾ of the way full.
Once your oven is preheated, place a madeleine pan into the oven on the middle rack. Only do one at a time. Bake for 6 to 6 and a half minutes or until it forms a hump and the outside layer has a buttery, golden texture that springs back.
Immediately flip your madeleine pan and transfer to a cool wire rack.
Serving
Dust with powdered sugar for added sweetness and enjoy them warm. To store, place the madeleines into an airtight container with paper towels on the bottom at room temperature for 1-2 days.


