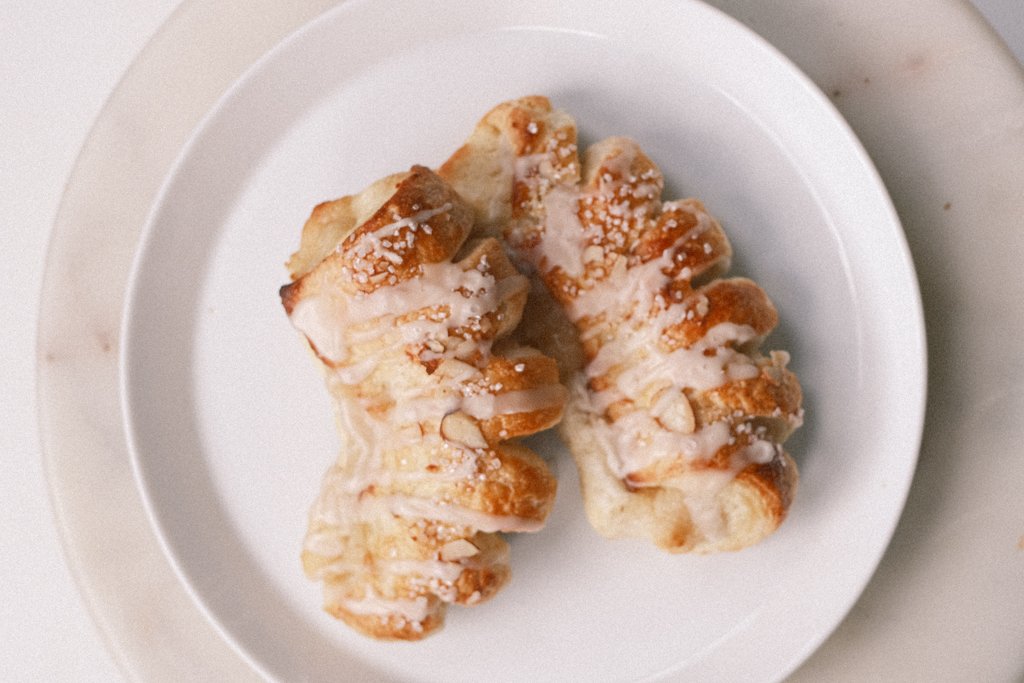
Bear Claws from Scratch
Time:
6h
Difficulty:
Challenging
Loot
18 bear claws
Another entry from my childhood…
This recipe goes out to a very special lady by the name of Ms. Lynette, who worked at the Tully's Coffee in Chandler around 2010. Every Tuesday morning, my dad and I went to Kroger’s for our weekly breakfast run before he drove to Phoenix to go to work for the day. Ms. Lynette always greeted us with a hearty laugh, and without even thinking, plopped our ritual order into the bag with her shiny silver tongs: a hot Americano; a small ice-water (liquid gold in Arizona); and two fresh, flaky bear claws, bursting with marvelous marzipan and a rich drizzle of glossy vanilla frosting. When she rang us up at the counter, she’d always have a joke or a few stickers ready for me, and on my 4th birthday, even surprised me with my very first camping tent – which would become a near-permanent piece of furniture in our living room for awhile.
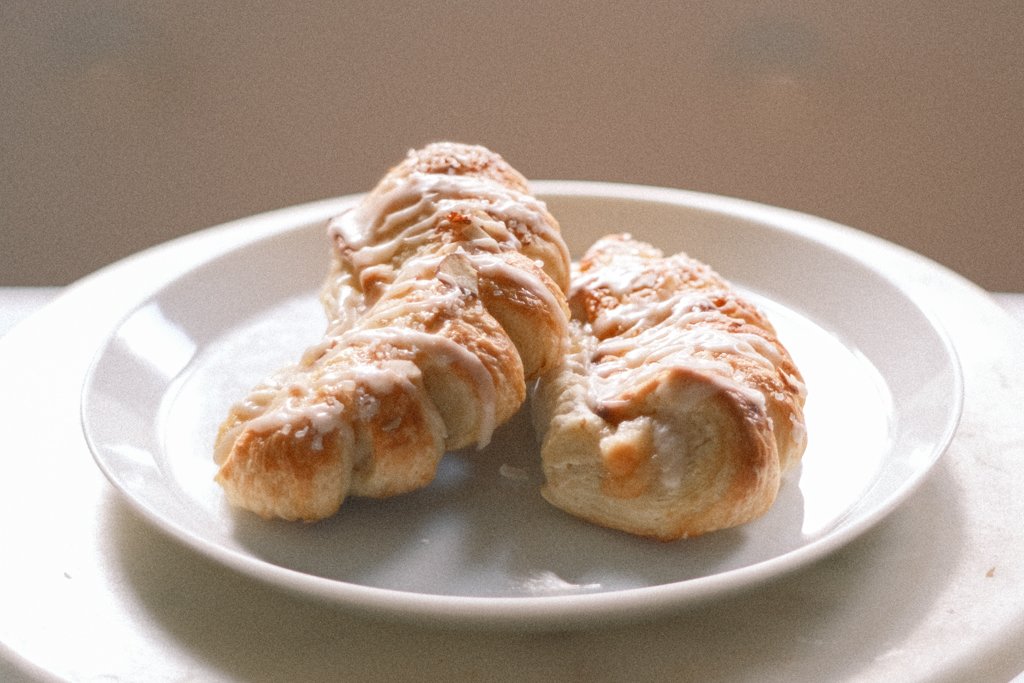
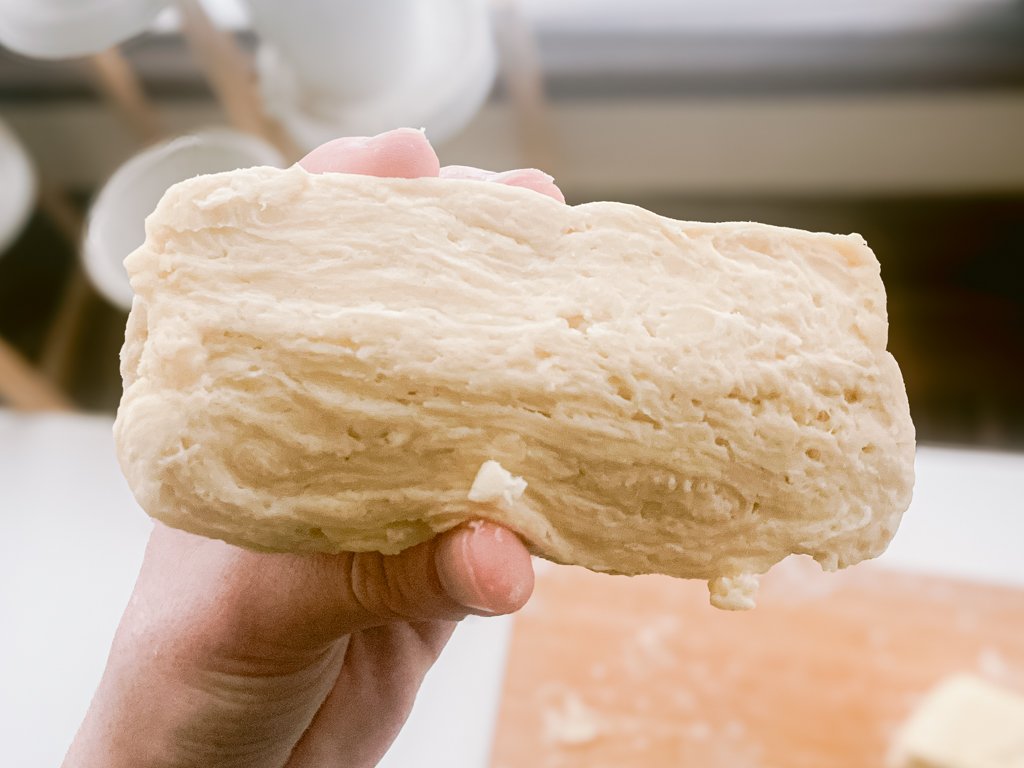
It’s been over 10 years since our final Tully’s breakfast before the cross-country move. No matter what Paneras or Peteses or stocked Marriott hotel buffets I pillaged…I never came quite close to finding that flavor…until today. Hell, I might’ve even surpassed it. Take a look at these layers!
Now, after reclaiming those Tuesday mornings, I want to share the love with you.
Word to the Wise
Make sure your yeast is frothy after it rests! This is how you know the yeast is activated, alive and “breathing.” If nothing’s happening after around 12-15 minutes, start again.
Don’t make your milk too hot! You’ll kill the yeast before it has a chance to bloom. Think of it like when you’re mixing warm milk and eggs. You don’t want to scramble them.
When you flour the dough on the hook, or use it to roll out the dough on the board, only a little palm-full will do. If you add too much, it’ll alter the chemistry of your dough.
Kneading with a dough hook can be scary. Especially if you’ve watched British Bake-Off, and fear Paul Hollywood scolding you for under/overworking it. Here’s a good rule of thumb: always leave it on 30 seconds longer than you think you should. You’ll know when your dough’s done when two things happen:
If you push down gently on the dough, it’ll rebound back into place.
If you try to tear a piece off, it stretches out. If it tears too early after a little stretch it’s likely under kneaded.
When you use the box grater, alternate sides you grate the butter so it doesn’t melt in your hands.
I know it’s hard, but LET THE DOUGH CHILL. Trust me, it’s an important step.
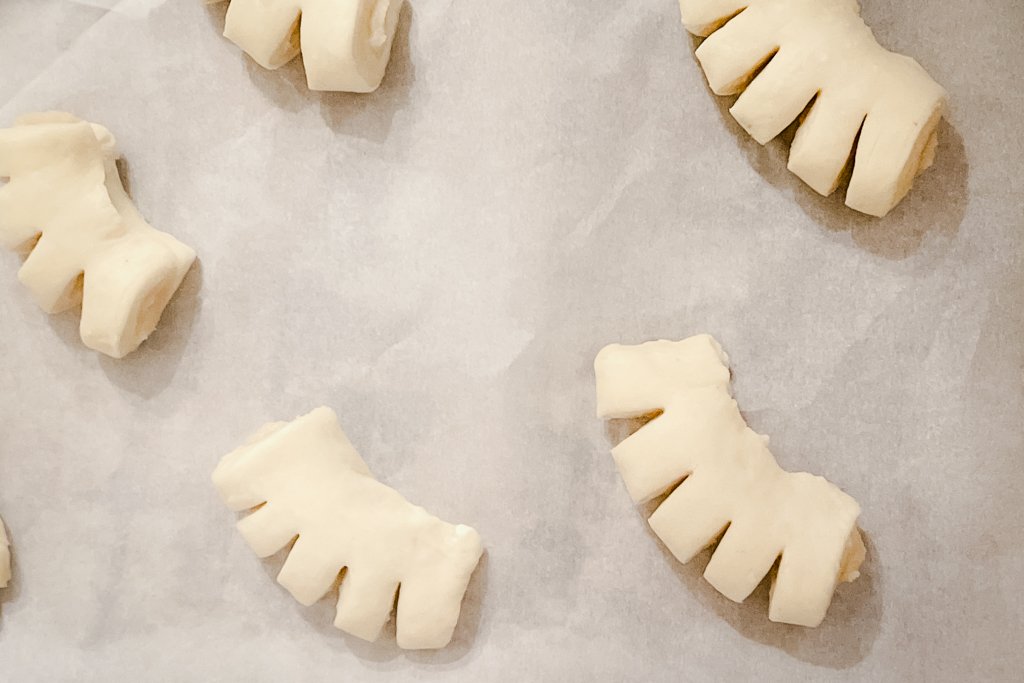
When you cut and splay your claws, make sure they are well spaced out like this.
Tips for Folding
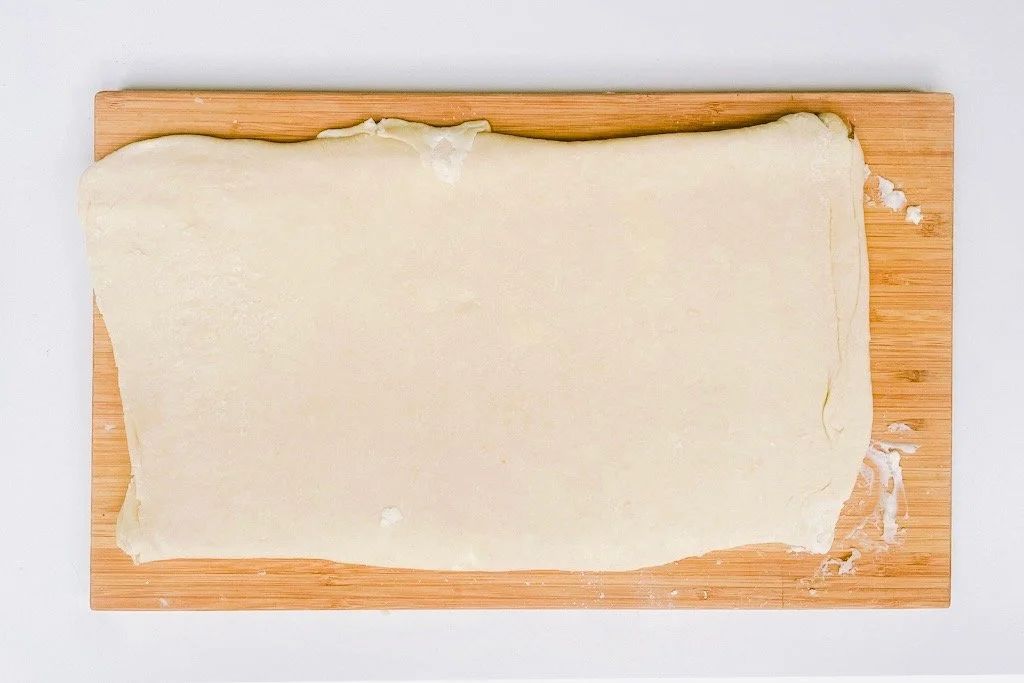
Roll out your dough into a big sheet/rectangle. If you read “Pains aux Raisins,” you know the drill.
Fold the dough into thirds, with one side over the center.
Fold the other side over the middle “letter-style.”
Ingredients
Danish Pastry
1 cup milk, cold
2 ½ tsp instant/active dry yeast
3 ¼ cup all-purpose flour
⅓ cup granulated white sugar
½ tsp kosher salt
1 egg
1 cup unsalted butter, cold (2 sticks)
Marzipan Filling
2 Tbsp unsalted butter, softened (1/4 stick)
⅓ cup powdered sugar
7-oz almond paste, room temperature
½ tsp almond extract
1 egg white
Toppings & Glaze
1 egg yolk, beaten mixed with 1 tsp of water
1 tsp turbinado sugar
¼ cup sliced almonds
1 cup powdered sugar
1 Tbsp milk
2 tsp water
¼ tsp vanilla extract
Instructions
Danish Pastry
Warm ½ cup of the milk in the microwave or a small saucepan, just until it’s warm to the touch (not too hot).
Add 1 of Tbsp sugar and all the yeast to the warm milk and mix. Let it sit for 5-10 minutes until frothy.
To a large bowl add the flour, remaining sugar and the salt. Whisk to combine.
Whisk the egg into the yeast mixture until well combined, then combine with dry ingredients.
Use a spoon, spatula, or stand mixer with the paddle attachment to mix the ingredients together into a rough and sticky dough. Until JUST combined. Do not overmix.
If you’re using a stand mixer, knead the dough on high for about 2 minutes. It should be slightly smooth, not sticky, and form into a ball. After this, do the windowpane test to see if your dough needs more time (see Word to the Wise). If so, do 30 more seconds.
Once it passes the test, roll out a large rectangle roughly 12”x16” (30x40 cm). Using a box grater, grate the cold butter over the top
Loop (3x):
Fold the dough letter-style in thirds (fold the shortest side over the middle third, then the other side over that). Think of it like folding a shirt (check out Tips for Folding).
Roll it out to a large rectangle again, sprinkling over a little flour to stop it sticking to the rolling pin or worktop if needed.
After the final time, don’t roll it out again.
Cut the dough into two square pieces, cover with plastic wrap and chill in the fridge for 4 or up to 24 hours.
Marzipan Filling
Add the butter and sugar to the bowl of a stand mixer with the paddle attachment or into a large bowl if using a handheld electric mixer. Beat on low.
Once it starts coming together, add half the almond paste, torn into smaller pieces. Beat to combine.
Add the egg white and almond extract and beat the mixture until combined and smooth.
Beat in the remaining almond paste.
Transfer the mix to a piping bag or a ziplock baggie with a hole cut out with roughly a ½ inch opening.
Assembly
On a lightly very lightly floured surface, roll the dough into a square about 11 inches x 11 inches. Trim the edges if you have to. Make sure it’s in the shape of a square.
Cut the rolled dough into 3 even strips from top to bottom. This is with one bag of dough and will make about 9. If you want to make more (they are a little small and addictive, repeat this with the other bag).
Pipe a line of almond paste mixture down the center of each one from top to bottom.
For each strip, run a damp finger along the right hand edge, then fold the long edges together, over the filling hotdog-style. Gently press your finger along the seam to seal it shut.
The logs might have stretched out so just tap the ends in to get it back to around 11 inches long. Cut each log into 3 even pieces from left to right.
Seam side facing away from you, cut 4 slits, about ⅓ of the way into the little dough pockets.
Place the pastries onto a large baking sheet lined with baking paper and carefully curve them outward so the “claws” splay open a little. Only do about 3-4 to a tray to make sure they have enough space for the heat to distribute.
Sit at room temperature for 30 minutes under a dry cloth to rest and puff. They will not rise much.
Preheat the oven to 395 degrees Fahrenheit.
Brush the tops of your pastries with egg wash. Sprinkle over the turbinado sugar and sliced almonds.
Going 1 tray at a time, bake for 12 minutes or until golden.
Icing (prepare while baking)
Mix together your milk and powdered sugar into a small bowl. Whisk until it’s nice and thick.
Add in your vanilla, and 1 tsp of water. Mix until it loosens up a little bit. Ideally, the frosting should drizzle slightly, but not fall into ribbons. You want this to eventually solidify on your pastry.
If it’s too thick to scoop, add in the other teaspoon of water and keep mixing.
Serving
Let the pastries cool at least to room temperature for about 10 minutes.
Drizzle your icing over each pastry in a light, zig-zag pattern from top to bottom.
Enjoy!
